[Quick Tip] Adding Images in WordPress

Using a visual resource such as an image or photo is a great way to spruce up your post or page content. This make your post more attractive and interesting to read.
Research from HubSpot found that when images or photos are used, there is a 37% increase in engagement with your posts, forms, social media content and so on.
How to add images to your website page in WordPress ? The good news is you could do it yourself and it is very straightforward.
Here is how to add an image, step-by-step:
Table of Contents
Step 1: Get ready your image
Prepare your image and make sure you know the file name and location of the image.
Your image or photo should be a JPG, GIF or PNG type file. Any other format is likely to be inappropriate for web use.
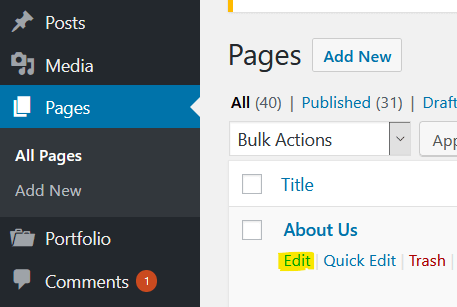
Step 2: Log into WordPress & Edit your page
Navigate to your WordPress’s admin login page (e.g. www.<YourDomain>.co.nz/wp-admin).
Edit your post/page where the image is required with the post editor.
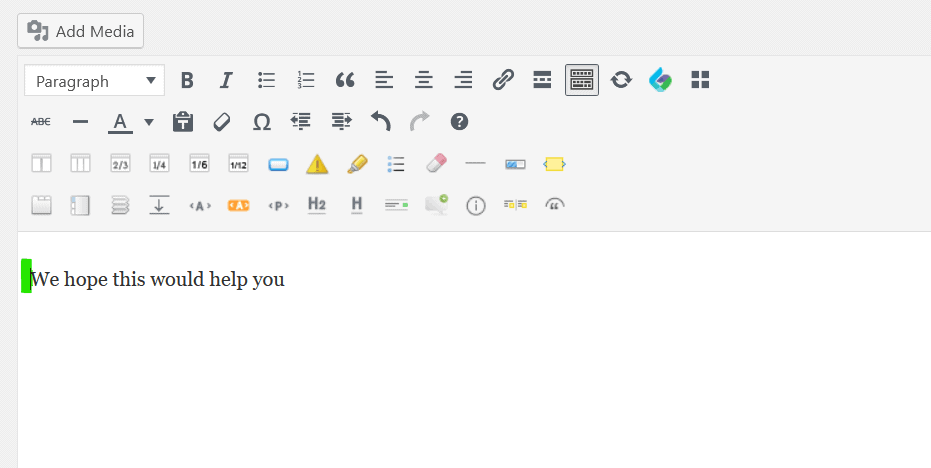
Step 3: Position the cursor in the content
Determine where you’d like to insert your image in your post.
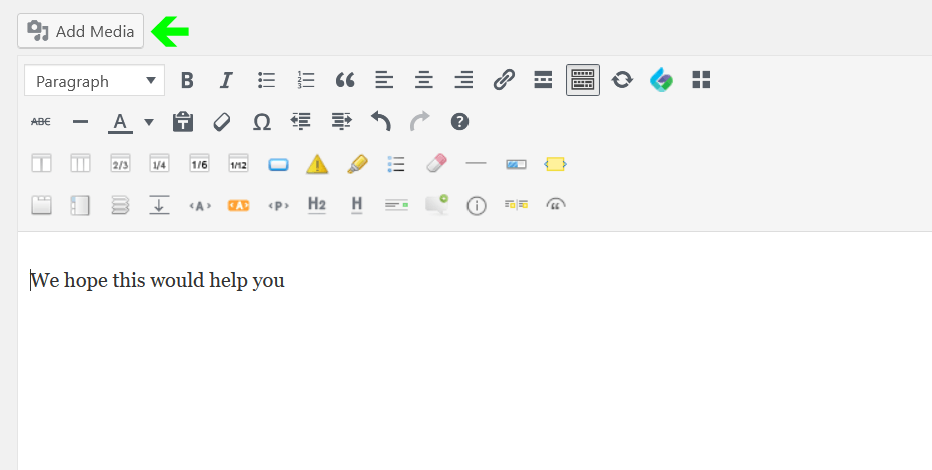
Step 4: Add Media
Above the Post editor toolbar, click the Add Media button and you’ll see the Insert Media box.
Step 5: Upload Files
WordPress site uses a media library to store all of your media like images and videos.
From this pop-up box, you can choose to either upload a new file or use an existing file from the media library.

If you’re adding a new image, select Upload Files. Otherwise, select Media Library to select an image which you have uploaded previously.
Click Select Files and locate the image file you’ve prepared in Step 1.
WordPress will now import your image to the Media Library.
Alternatively, your new image can also be dragged and dropped into the box, instead of using the ‘Select Files’ option.
Step 6: Adjust the options
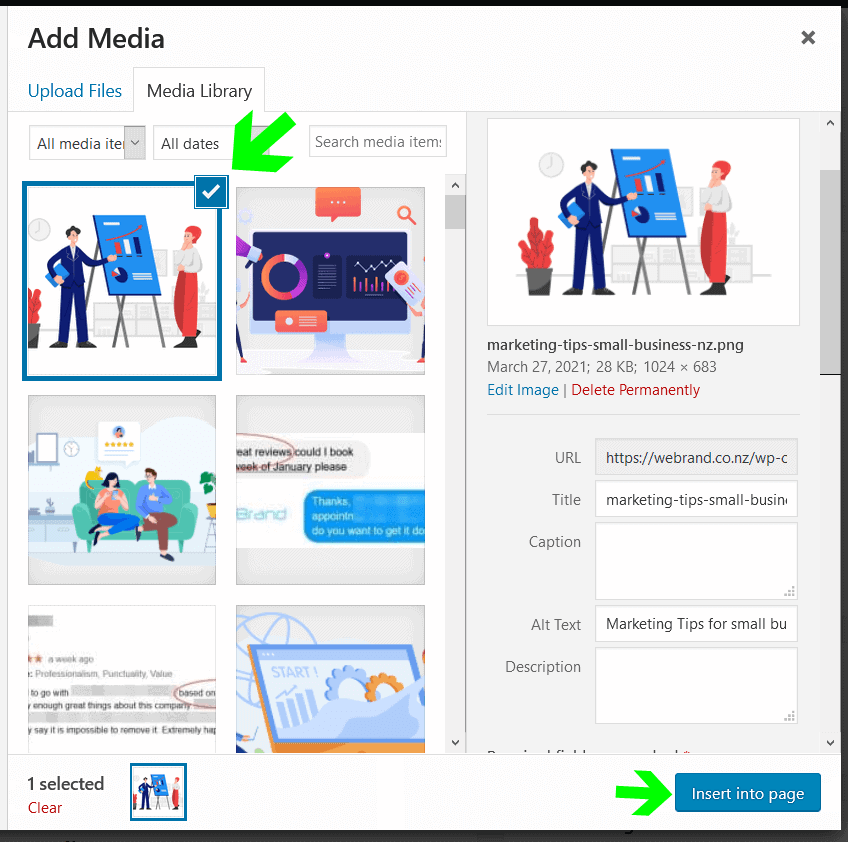
Now that your image has been uploaded, you’ll see it has been added to the media library. On the right side of this box, you’ll see the attachment details for this page.
Ensure these image settings are configured correctly.
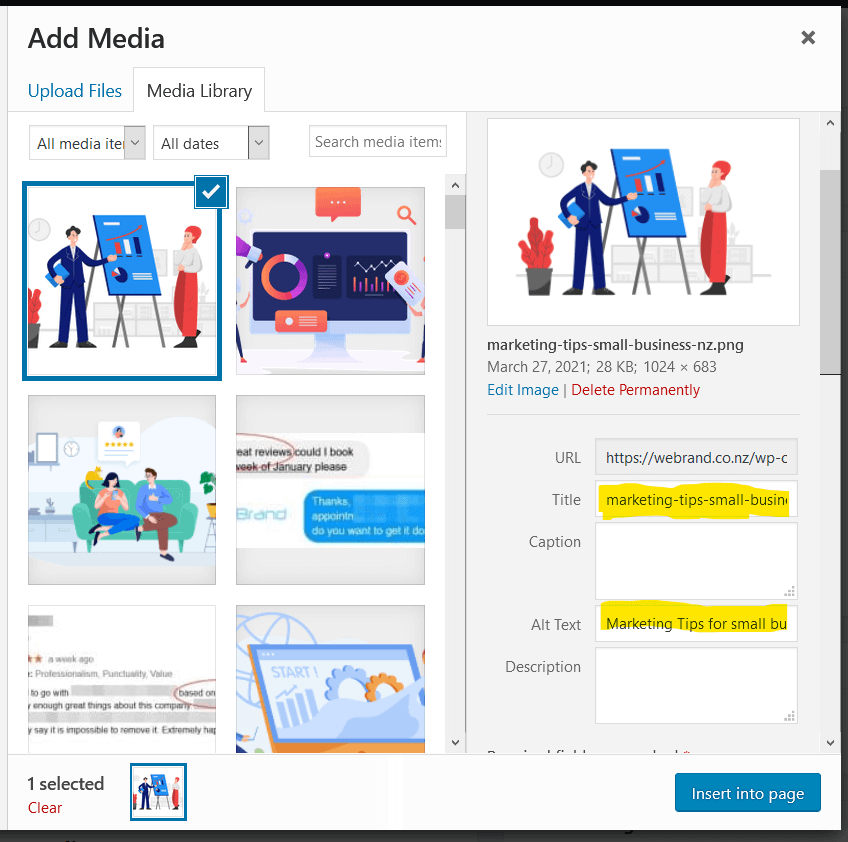
Add Media dialog box Options
- Title: A short text description of the image
- Caption: This is optional unless your design supports image captions
- Alt Text: Alt text (alternative text) is the written copy that appears in place of an image if the image fails to load on a user’s screen. It also helps screen readers or search engines to understand the image. Usually the same as the title.
- Description: A text to explain about the image and it is for internal use only. Usually not required.
- Alignment: How would you like to position your image.
- Link URL: Where the inserted image should link to. It could be an image URL or any other website link.
- Size: The size of the image
Step 7: Finally, Insert the image
Make sure the image has a checkbox and press the Insert into Page/Post button.
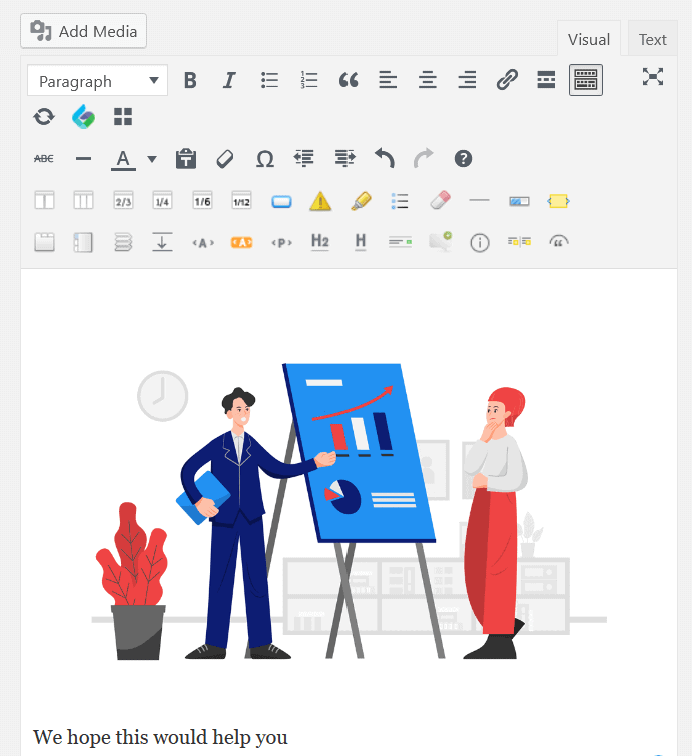
Now you’ll see your image has been added to your post.
Want to change the image settings after an image has already been inserted?
If you decide to change something with the display of your newly inserted image, just click the image once and a quick & easy editing menu will pop up.
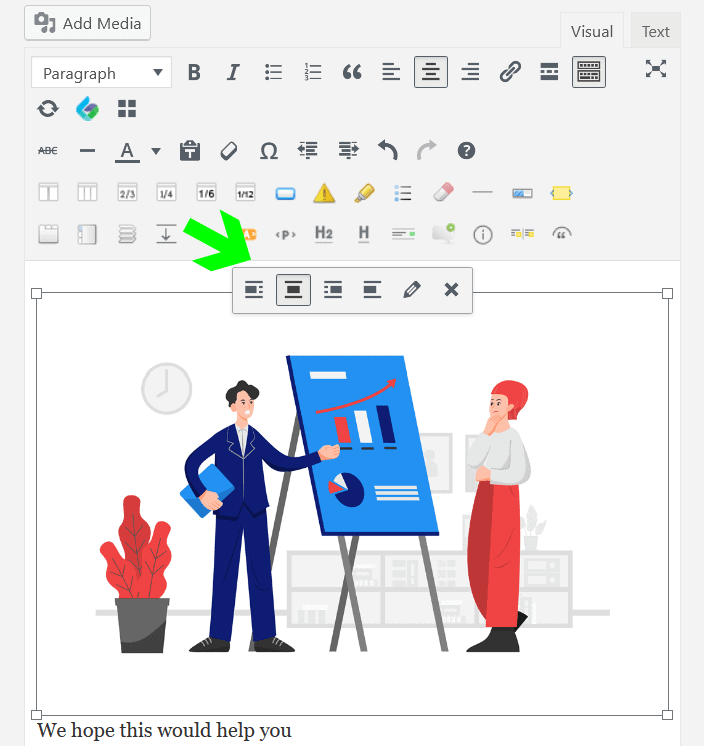
- Alignment options – Left, Center, Right and No alignment.
- Edit image details/settings (pencil icon)
- Delete an image (a cross icon).
Also, you can resize your image manually by grabbing one of the corners and dragging it up or down in size.
Hope this helps.
Let us know if you need any help on your website here.
Recommended Posts


5 Marketing Tips For Small Businesses In New Zealand
March 27, 2021

Top 10 Local Business Listing Directories in New Zealand
February 27, 2021